New balance staff, new Jewel and repair hairspring

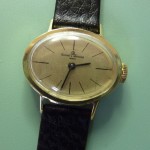
This was a challenging, yet enjoyable project.

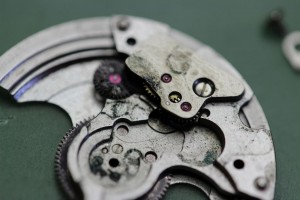
As found in my previous post regarding this watch, the watch had a damaged balance staff, a broken jewel and the hairspring was quite out of shape.

In fact – on further examination I found the balance staff was actually non-hardened and so the metal was very soft. When turning off the rivet it almost felt like cutting brass.

Showing the damaged hairspring

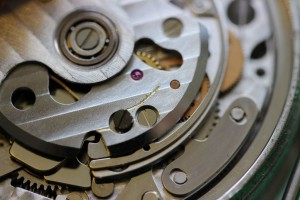
I found a suitable jewel for the fouth wheel pivot size and as this was a rub-over style jewel I had to use some antique jewelling tools to prepare the fitting. Once fitted and rubbed in – the wheels are placed back in the watch to test the freedom of the wheels and the tru-ness. All was satisfactory so I dismantled the watch again for a deep clean.

After cleaning all the components next next job is to tackle the hairspring. This is a slow, methodical job. The idea is to get the coils as even as possible. This spring had around 15 irregular bends in it which had to be identified and rectified.

Work started on straigtening the hairspring
Work started on straightening the hairspring


Getting the coils as even as possible


Very close to finishing - will do final tweaks when the watch is re-assembled
Very close to finishing - will do final tweaks when the watch is re-assembled and the new staff fitted.

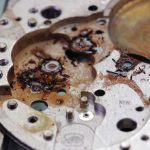
The broken jewel needed to be replaced – and for this I use the best quality “Seitz” jewels. First I have to measure the pivot on the fourth wheel to make sure I select the correct diameter. For this I use a pivot gauge and what I want is to place the wheel pivot in the correct size hole in order to ascertain the correct diameter.

Judging the correct jewel hole size. The wheel is placed in the guage and the new jewel is picked accordingly.


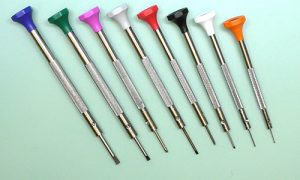
This watch has rub-in style jewels. It is tempting to ream this out and use the more modern press-in method f fitting the jewel. However, best practice over-rules this and we should attempt original methods where possible. So I have selected an antique jewling tool to spread the metal to allow the new jewel to be pressed into the seating. Once it is placed correctly – another tool is used to close the metal over the jewel – the jewel is secure and tight in it’s seating.

Spreading the metal to allow the jewel to be pressed into the seating.


Using another jeweling tool to press the jewel into the seating. This makes sure it goes in true and flat.


The jewel in place and the metal rubbed over it. This is now secure and ready for testing.


With the wheels back in it is important to test the free running of the wheels and make sure everything is true.
All the watch parts cleaned. Now I can work on the balance staff.


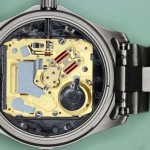
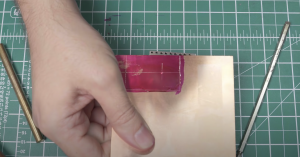
Now to make the balance staff – first I have to safely remove the old one without damaging the balance wheel. The best way to do this is to mount the balance on the lathe and carefully cut away the rivet. Once this was done I found the staff was still tight on the wheel so I used a tool called a Platax tool to safely knock the staff out. This tool secures the balance wheel and makes it very difficult to damage the wheel or the hole at the centre.

Using the Platax tool to remove the balance roller.


The wheel mounted on the lathe ready to cut away the rivet.


Cutting away the rivet. The metal way very soft. It certainly was not hardened steel.


Using the Platax tool again in order to knock out the staff.


The balance in pieces. Top Left: The roller. Top Right: The old balance staff.


Selecting the correct diameter of blue pivot steel. Time to turn the new staff.


The new staff is starting to take shape.


I should have de-magnetised the steel first ;)
I should have de-magnetised the steel first


The new staff is fitted to the balance wheel. Now I need to reduce the pivots to the correct diameter.


When I cut a new staff, I always make the pivots over size in both diameter and length so that I can slowly reduce them to the perfect size. At this stage it is more about eye and feel. The tool I use is called a Jacot tool. I use a burnisher to reduce the pivots and this has the added bonus of further hardening the metal surface.

The balance mounted on the Jacot tool. A burnisher is used to slowly reduce the pivot diameter until it is perfect.


When polishing and reducing the pivots I test the balance in place from time to time.


With the balance staff finished it is now time to fit the balance spring and adjust it. At this stage the spring is finally tweaked for flatness and being true. Also making sure it will run in beat.


With the spring in place a lot of tests are performed before putting it all together.


Finally - it's all together and running. Now for testing.


Initial testing is done outside of the case with the dial and hands on.


Several days later and final testing is done in the case


Related posts